How To Grow Black Walnuts From Seed
Create a walnut orchard from seed using a simple propagation method to germinate nuts and produce young trees.
Walnuts, pecans, and other nut varieties, including the hardy Southern native known as the black walnut, are often expensive to purchase, often victims of deer, disease, and other pests. For less-serious orchard enthusiasts and gardeners, however, one of the most cost-efficient means of planting an orchard may mean propagating trees from nuts.
To cultivate a do-it-yourself black walnut orchard, harvest nuts from a healthy tree known for quality produce, including sizeable kernels, hardiness, and disease resistance.
Gardeners should select a large number of nuts to propagate, to increase the chance of cultivating several desirable trees for planting once the nuts are evaluated, stratified, and eventually, planted.
Table of Contents
Selecting Black Walnuts for Planting
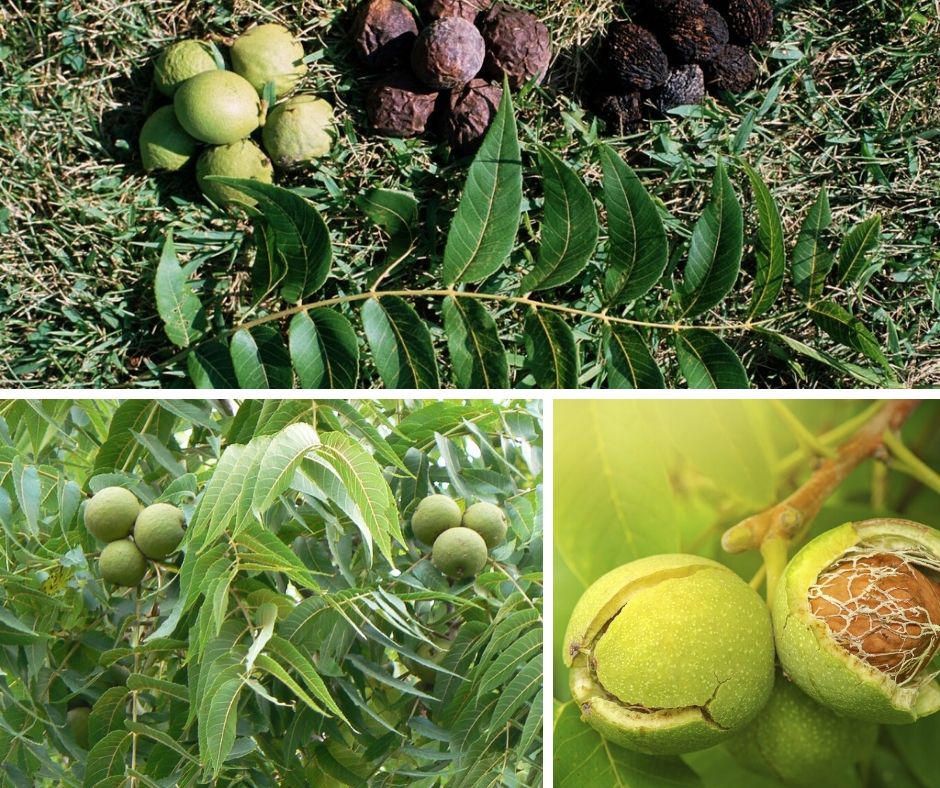
Black walnuts, with their thick shells and coarse outer hull, can be difficult to propagate by simply burying and hoping for the best. Due to the smaller nut kernel (in comparison to English or Carpathian walnuts, for instance), the nuts need to be “tested” before stratification, since poor nut kernel often prevents germination.
The nuts are tested and prepped for stratification using a bucket of water and a pair of thick rubber gloves to protect the gardener’s hands. The brownish black hull which encases the nuts shell is removed, along with the slimy black debris coating the shell. This protective layer, once green and hard before the nut ripened, is no longer needed and should be removed to promote germination.
The nuts, encased in their shells, are then dropped a few at a time into a bucket of water. The floating nuts contain small kernels with limited germination material; therefore, the more buoyant the nut, the less likely it is to produce trees. Heavier nuts, or those which contain sizeable nut kernels, sink to the bottom.
Stratifying Black Walnuts
The nuts, still encased in their shells, should be buried in several inches of damp sand or sawdust in a process known as stratification. Containers like plastic bins or large planters work well, since the material can be easily burrowed to place the nuts inside.
This burial process helps break down or soften the black walnut’s touch shell to allow the nut to sprout. The stratified nuts should be stored in a cool location with temperatures not below thirty-three degrees Fahrenheit until early spring. Once the danger of frost is gone, the nuts are ready to be planted.
Many southern regions are home to wild fruits and nuts that yield small crops for cash or food harvests for personal consumption.
Planting and Identifying Black Walnut Trees
Remove the nuts from the damp sawdust or sand and plant them in containers or directly in the ground in rows or hills. The nuts can be grouped together or sown in rows spaced apart if desired.
Newly-sprouted trees may at first resemble weeds or young sumac plants, with similar leaves blossoming from fuzzy purple-green stems; as the trees grow, the base takes on a woodier appearance, with rapid achievement of height and foliage.
Trees grouped together should be thinned to enhance the growth of the healthiest seedling. Trees spaced apart may need thinned also, to eliminate bent or deformed saplings with limited growing potential.
Maintaining a New Walnut Orchard
The young trees can be transplanted into the orchard and protected using wire cages and fences until they achieve enough size to no longer be threatened by deer.
Most black walnut trees will produce their first crop of nuts within five years, achieving production maturity at ten or fifteen, making seedling trees a long-term commitment for gardeners. The reward, however, is an orchard produced by personal labor, frugal innovation, and serious investment in long-term property value.